Django Model

February 02, 2025
Today I am working on the FitCypher database backend, to keep it simple the nutrition and health metrics will be posted into a common Entry model :
class Entry(models.Model):
    user = models.ForeignKey(User, on_delete=models.CASCADE, related_name="entries")
    date = models.DateTimeField()
    tracking = models.CharField(max_length=255)
    string_value = models.CharField(max_length=255, null=True, blank=True)
    numerical_value = models.DecimalField(max_digits=10, decimal_places=2, null=True, blank=True)
    notes = models.TextField(null=True, blank=True)
    tags = models.CharField(max_length=255, null=True, blank=True)
    source = models.TextField(null=True, blank=True, default="fitcypher")

    def __str__(self):
        return f"{self.date.strftime('%Y-%m-%d')}, {self.user}, {self.string_value}"
This Entry model is a flexible and generic way to store various health and fitness metrics for users.
Below is an explanation of each field and its purpose:
1. user
user = models.ForeignKey(User, on_delete=models.CASCADE, related_name="entries")
- Purpose: This field establishes a relationship between the
Entryand theUsermodel. It indicates which user the entry belongs to. - Details:
on_delete=models.CASCADE: If the user is deleted, all their associated entries will also be deleted.related_name="entries": This allows you to access all entries for a specific user usinguser.entries.
2. date
date = models.DateTimeField()
- Purpose: This field stores the date and time when the entry was recorded.
- Details:
- It is essential for tracking when a specific health metric was logged (e.g., weight on a particular day, steps taken on a specific date).
3. tracking
tracking = models.CharField(max_length=255)
- Purpose: This field specifies what type of health or fitness metric is being tracked (e.g., “weight”, “steps”, “calories”, “heart_rate”).
- Details:
- It acts as a label or category for the entry, allowing you to differentiate between different types of metrics.
4. string_value
string_value = models.CharField(max_length=255, null=True, blank=True)
- Purpose: This field stores a textual value for the tracked metric, if applicable.
- Details:
- It is optional (
null=True, blank=True) because not all metrics will have a textual value. - Example: If
tracking="mood",string_valuecould be “happy” or “stressed”.
- It is optional (
5. numerical_value
numerical_value = models.DecimalField(max_digits=10, decimal_places=2, null=True, blank=True)
- Purpose: This field stores a numerical value for the tracked metric, if applicable.
- Details:
- It is optional (
null=True, blank=True) because not all metrics will have a numerical value. - Example: If
tracking="weight",numerical_valuecould be70.5(in kg).
- It is optional (
6. notes
notes = models.TextField(null=True, blank=True)
- Purpose: This field allows users to add additional comments or details about the entry.
- Details:
- It is optional (
null=True, blank=True). - Example: If
tracking="workout",notescould describe the type of workout performed (e.g., “30 minutes of cardio and 20 minutes of strength training”).
- It is optional (
7. tags
tags = models.CharField(max_length=255, null=True, blank=True)
- Purpose: This field allows users to add tags or keywords to categorize or filter entries.
- Details:
- It is optional (
null=True, blank=True). - Example: Tags like “morning”, “evening”, “high-intensity”, or “low-carb” can help organize entries.
- It is optional (
8. source
source = models.TextField(null=True, blank=True, default="fitcypher")
- Purpose: This field indicates the source of the entry (e.g., a specific app, device, or manual entry).
- Details:
- It has a default value of
"fitcypher", which could be your app’s name. - Example: If the data is synced from a fitness tracker like Fitbit,
sourcecould be"Fitbit".
- It has a default value of
9. __str__ Method
   def __str__(self):
       return f"{self.date.strftime('%Y-%m-%d')}, {self.user}, {self.string_value}"
- Purpose: This method provides a human-readable string representation of the
Entryobject. - Details:
- It is useful for debugging, logging, or displaying the entry in the Django admin interface.
- Example output:
"2023-10-15, john_doe, 70.5".
Summary of Use Cases
- Tracking Weight:
tracking="weight",numerical_value=70.5,notes="After breakfast",tags="morning". - Tracking Mood:
tracking="mood",string_value="happy",notes="Had a great workout". - Tracking Steps:
tracking="steps",numerical_value=10000,source="Fitbit".
This model is highly flexible and can accommodate a wide range of health and fitness metrics, making it a great foundation for a simple health and fitness tracker.
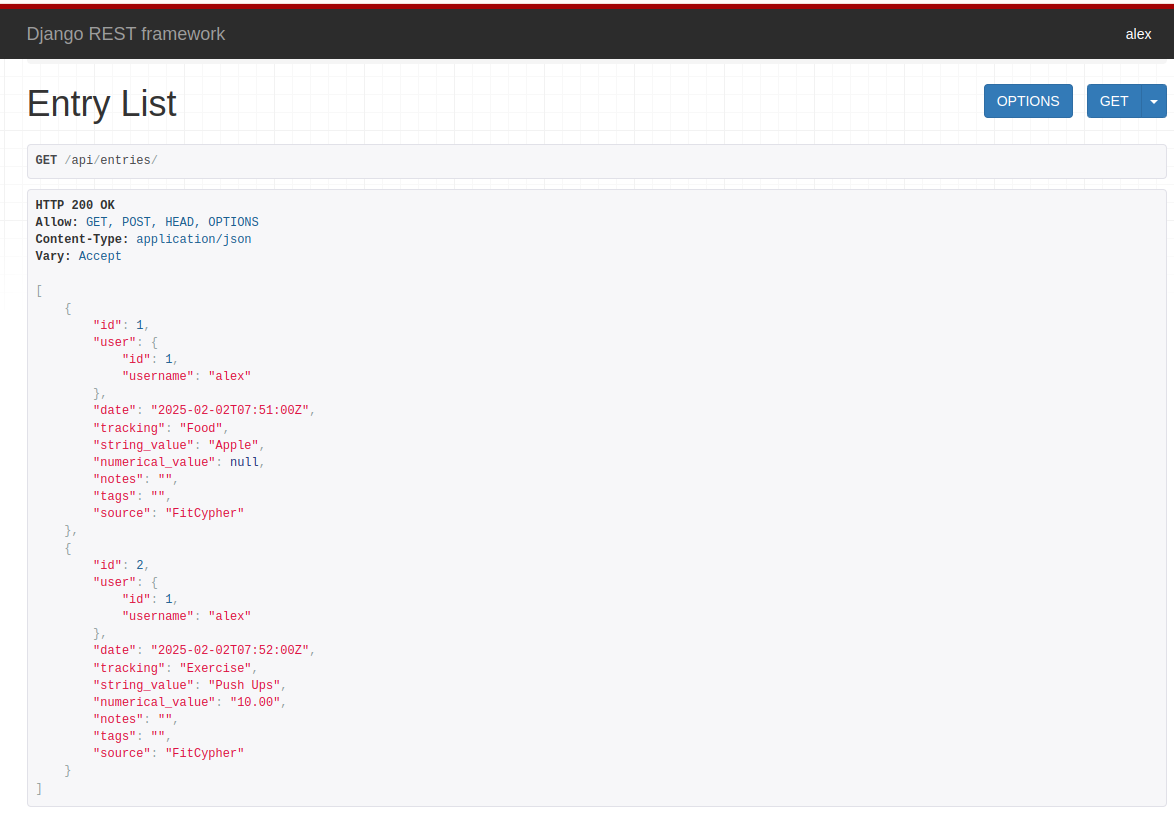
We will use Django Rest Framework as the API framework to interact with this model.
To make the API friendly to use we’ll provide an API UI :
Try out FitCypher here :
https://alexlaverty.pythonanywhere.com/
Or git clone the FitCypher github repo and run it locally :